60 Gal w/ 36 Gal Sump & Stand.

Wow, hey there stranger! Welcome back! :D

Thank you. It's been almost a year, but I'm back. Once we got the basement ripped apart and put back together, I couldn't stand the 2 tanks just sitting there in the corner collecting dust so I stole (I mean borrowed) some 2x4's from work and built the frame. I think Kim noticed I was sulking after I built it and let a few of my bills slide. (gawd I love that woman!!)

How have you been & how's the new place? We have a Lowe's now!!
 
Re: 60 Gal w/ 36 Gal Sump & Stand. - Oct. 16/10 Updates

More updates. It was a semi-busy day but snuck in sometime to work on the stand.
 

Attachments

  • doors marked out.webp
    doors marked out.webp
    37 KB · Views: 291
  • ready to cut doors.webp
    ready to cut doors.webp
    40 KB · Views: 288
  • doors almost cut out.webp
    doors almost cut out.webp
    41.8 KB · Views: 282
  • cleaned and ready to to prep for paint.webp
    cleaned and ready to to prep for paint.webp
    23.6 KB · Views: 273
  • preped for paint.webp
    preped for paint.webp
    19.3 KB · Views: 283
  • coat one on back of tank.webp
    coat one on back of tank.webp
    21.5 KB · Views: 280
Great job so far. I like that you painted the back of the tank. Good plan.

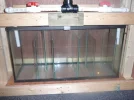
Thanks. I did it for 2 reasons. One you said to in a thread I read, and second I didn't want the plumbing showing when you looked in the tank & I hate those tape on back covers.
 
Just came back from Brunch with Kim & we stopped by Home Depot before heading home. I didn't even buy anything there. Stopped at TSC and picked up all the parts I needed to plumb the tanks, except one piece which I headed over to Home Hardware and picked up. I'm going to put the last coat of paint on the back of the tank, finish the stand and start the plumbing. Will post more pics later tonight if I get it all finished.
 
Just got the last coat of paint on the tank. Didn't get a chance to work on the stand or tank. Washing machine needed a little repair so I didn't have to ride it while it was going threw it's cycles. Lid switch on it went and had to rip the whole thing a part to remove it and tie the wires together til I get a new one. Maybe this week I'll get a chance if I don't work 1,000,000 hours. Sorry!:grumble:
 
I like the way the wood looks. Looks like boat decking or something. Very nice.
They are old tobacco slates. It's what they use to use to tie the tobacco to so it could be hung in the kiln to dry. $2.50 for a 100 of them. Nice and cheap and I love the smell of cured tobacco.
 
How neat. Now that you mention it, I remember seeing some similar in the curing barns at the Camacho factory in Honduras. Except they used round polls.
 
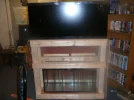
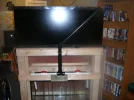
Worked on the stand a little bit tonight. Just have to trim the doors and put the hinges and handles on & it's good to go.
 

Attachments

  • stand-is-almost-finished.webp
    stand-is-almost-finished.webp
    35.6 KB · Views: 637
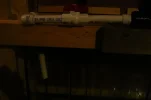
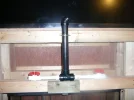
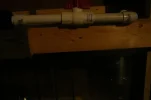
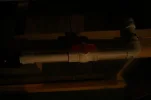
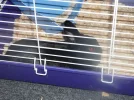
Plumbing time. I went from 1 1/2" ABS to dual 3/4" PVC into my sump. Both sides I can control the flow with ball valves. Comments and suggestions are welcome. Everything is dry fitted together cause I need an elbow I forgot and it was 5 minutes til the hardware store closed and I couldn't make it in time. There's always tomorrow. I also included a picture of my critic. She makes sure I keep working and lets me know the saws, air compressor, and nailer are too loud and scares her. LOL!
 

Attachments

  • plumbing4.webp
    plumbing4.webp
    9 KB · Views: 338
  • plumbing3.webp
    plumbing3.webp
    10.1 KB · Views: 306
  • plumbing2.webp
    plumbing2.webp
    39.8 KB · Views: 468
  • Plumbing 1.webp
    Plumbing 1.webp
    26.1 KB · Views: 358
  • Ready to plumb.webp
    Ready to plumb.webp
    33.1 KB · Views: 341
  • plumbing5.webp
    plumbing5.webp
    10.1 KB · Views: 311
  • plumbing6.webp
    plumbing6.webp
    7.7 KB · Views: 333
  • plumbing7.webp
    plumbing7.webp
    34.7 KB · Views: 342
  • Nibbles.webp
    Nibbles.webp
    56.3 KB · Views: 447
Back
Top