poksal's 20 long frag tank build

poksal

Well? .. I AM trying
moved.. was........ Fish Tanks / Custom Frag Tank

Update of 1/5/13
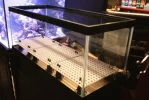
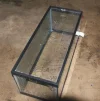
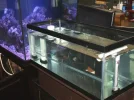
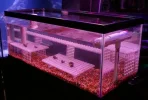
I built the riser and cut the egg crate grates. The stands holding the grates are the "chairs" used to hold re-bar for doing concrete work.

How do we test for if a plastic causes PO4 problems? These "chairs" (that really is their name) are made from black recycled polyurethane... so I have some concerns.

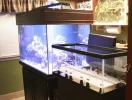
The tank is not drilled yet.. nor is the base and riser. This is the practice fit, and allows me to use the computer system and be sure this will fit while I actually try to work. The desk must now be braced, and the tank leveled some.

I am interested in frag tank water flow ideas and opinions.

Before you ask... the cage up behind the 95 gal is where Delilah lives. She can travel from that cage into a cage to the right where she has no vegetation and a light on during the day if she pleases. She is in the other cage during this picture.. She is a 52" California King Snake.. and is kid friendly and goes to schools with me as the attention focus. The kids line up to "hold" her, but I never turn loose of her "neck". If a kid does not be quiet and listen the teachers are instructed to remove them from the line.. it works!

If you ask Delilah nicely she may pose for a picture with her hand maid, feeder, care giver, servant. She is spoiled rotten. When it is cool she likes to coil up under my shirt on my belly while I am on the forum or working at my computer.
 

Attachments

  • DSC00024.webp
    DSC00024.webp
    42.1 KB · Views: 1,666
  • DSC00025.webp
    DSC00025.webp
    38.2 KB · Views: 1,862
Last edited:
1/6/13
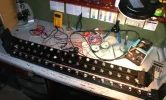
Today I modify the RapidLED 36" rails to fit and be used for this build.

The two rails which are tied together will be shortened to between 28" & 30", YTBD. The Creed LEDs will be removed, desoldered, tested, and sorted. I will be choosing 4 whites, and deciding on the remainder as blues, some UV, some red, and some green. All will be wired to two dimmers. From experience I now know I will be running them at a low power setting.

The two D cell batteries you see soldered in series is the classic way to test an LED. Touching the pos and neg poles of the LED chip will fire it and you should be wearing sun glasses.

All the lenses will be being removed and saved. I intend to not use any lenses.

Thank you, stay tuned.
 

Attachments

  • DSC00027.webp
    DSC00027.webp
    50.7 KB · Views: 675
I decided on 6 white, 12 blue, 2 red, 2 green, & 6 UV.

On three dimmer drivers will be:
->blues,
->whites and two UVs
->remaining UVs, reds, & greens
 
Last edited:
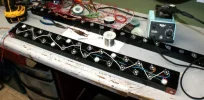
Twin rails of Cree LEDs wired and ready to test with the dimmers.
 

Attachments

  • DSC00028.webp
    DSC00028.webp
    42.2 KB · Views: 560
1/7/13
Today it was time to drill, I didn't have much time and it was raining so it was even messy under the cover on the back patio.

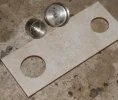
I wanted to take a practice shot with the drills before I drilled the tank so what better than to drill some ceramic tile left over from the bedroom I just tiled. Which by the way make perfect starter guides to drill the tank. Although it doesn't show it here I placed a second tile under the one being drilled to protect the drill and the patio pad.

So I duck taped the tile to the tank bottom as shown and drilled away. Frankly the hardest part was getting the hose to stay where I wanted it to keep the drills wet while I did the drilling. This is some of the toughest duck tape I've ever seen but it didn't stick after it got wet.. (not very good duck tape, the point is to be water proof). But it held long enough to get a good groove started in the glass and wasn't needed after that anyway. I used a drill that plugs in because you are going to be drilling for a couple of minutes in each hole if you take your time, and that would be a bit of work on my Dewatt's in one run. I think I recommend a real drill with the electric cord.

It went well and was very easy to do.. I found that if you walk the drill around some (wiggle) it cuts faster. Be sure to baby it for the last little bit so as to not break through too hard.

Geeeze, it was a bit of a nerve tester until I saw how easy it went.. and when it was done I took a big deep relaxing breath. YEAH! the tank is drilled... on to more parts of the project tomorrow evening.. I hope.

My drills came off an E-bay "buy it now", the cheapest I could find shipped from inside the USA.
 

Attachments

  • DSC00029.webp
    DSC00029.webp
    41.9 KB · Views: 494
  • DSC00030.webp
    DSC00030.webp
    22.8 KB · Views: 510
  • DSC00034.webp
    DSC00034.webp
    33.7 KB · Views: 514
Last edited:
1/8/12
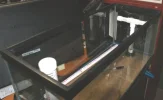
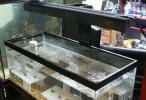
Today I installed the tank into the final position and installed the over flow tube and inlet stream bar. I have a mess of saw dust to clean up.
 

Attachments

  • DSC00036.webp
    DSC00036.webp
    19.8 KB · Views: 558
  • DSC00035.webp
    DSC00035.webp
    38.6 KB · Views: 618
Wooohoo... it is raining so animal rescues and such are shut down unless there is an emergency... So.. This AM I plumbed, filled, and tested this build. It works.. the over flow is silent and there is plenty of flow in the tank... and no leaks.... you breathe better after the no leaks part.

So with the $1 a gallon tank from PetCo and having almost all the parts except the bulkhead and drills.. this has been a cheap frag tank to build... now it needs the sand bed and racks.. AND coral frags... fish, CUC, etc... AND I still need to hang the LEDs and wire them to the three drivers and dimmers... and adjust them.. the list is growing.. BUT I have the day off.. Whoooohooo.. I love a project.
 

Attachments

  • DSC00038.webp
    DSC00038.webp
    39.6 KB · Views: 567
Last edited:
91/8/13
Final on the $1 gallon PetCo 20 gallon long frag tank build..

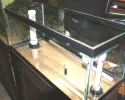
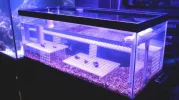
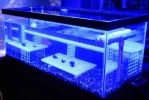
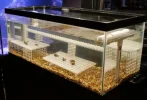
It was a rain day so I took advantage. Completed the plumbing, the frag rack, gravel fill, LEDs w/ dimmer drivers, and a home built LED light mount.

The pictures are:
>Expected spectrum of LED configuration
>Blue only
>White only
>UV, Red, Green string of LEDs only
>Showing the LEDs mounted and hanging
 

Attachments

  • DSC00039.webp
    DSC00039.webp
    35.4 KB · Views: 534
  • DSC00040.webp
    DSC00040.webp
    44.6 KB · Views: 557
  • DSC00041.webp
    DSC00041.webp
    39.4 KB · Views: 591
  • DSC00042.webp
    DSC00042.webp
    36.3 KB · Views: 512
  • DSC00051.webp
    DSC00051.webp
    47 KB · Views: 654
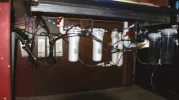
So after all that, this is what is under my desk... not in my display cabinet.. "under my desk".. thee are still two more stages of per filter against the left wall of the desk not in this picture.
Note the angle iron frame to support the weight of the 20 gallon frag tank (screwed to the bottom of the desk top).


What's under your desk?
 

Attachments

  • DSC00049.webp
    DSC00049.webp
    25.7 KB · Views: 496
Last edited:
have to mount all the equipment somewhere lol. nice setup poksal frag tank build came out great.

Thank you.. this is in my "man cave" and the mess on the bench behind them will get cleaned up tomorrow evening.. .....if I want to... :evil!?!?:

And for the record.. those "chair" things they use for holding re-bar while they pour concrete don't work worth a hoot... they are too lite. It is much easier to zip tie pieces of egg crate to pieces of egg crate. ..like in my final pictures.
 
Last edited:
Sis, please 'splain what you're thinking why, I absolutely need to listen to the voice experience. At this point it is easy to remove....you know me, it is the only thing the closest LFS had yesterday.
... my idea was any on the bottom or spill over corals can "root" to it and have something with weight I can move easy.

.. and.. what were you doing up so early??? .. it was what, 3AM there?

I just looked at the few little corals I moved to the new frag tank.. I must of almost nailed the light adjust 'cause they all "look'n good" this AM. I'm wondering if the added UV has bearing. I have the PAR down pretty low... the light is about 1/2 blue, 1/4 whites, 1/4 other (UV with some red and green) at this setting.
 
Last edited:
Aragonite sand breaks down over the time and the calcium released buffers your pH.

(This is why you should use sand in cichild tanks as well... since they require a higher pH than a regular tropical tank.)


And I wasn't up early, I was up late.
 
Aragonite sand breaks down over the time and the calcium released buffers your pH.

(This is why you should use sand in cichild tanks as well... since they require a higher pH than a regular tropical tank.)


And I wasn't up early, I was up late.


OK. I'll bite...why up so late... I do the midnight every night thing - sometimes 1AM... but by then I'm ready for bed.

..on subject... I thought you would say something about trapping crap in the gravel, and that could be true.. I guess... ?

This tank is plumbed with the main display.. so do you think the sand in that tank has me covered in the buffer concept??? .. and thanx..BTW
 
Giving out advice, clearly.

And yes, the gravel is a bad idea for the same reason crushed coral is a bad idea. Plus it's just ugly.
 
/// LOL.... OK.. .. got ya... ;)

..indeed a red head!.... oh yeah...
 
Last edited:
I tend to agree with Erin...The idea of vacuuming a frag tank just seems like a big pain in the ass. Most frag tanks I have seen are bare bottom or they have a 1/2 inch of sand. As far as if its ugly...well thats like telling a dude you dont like his pink car....I just dont go there.
 
Back
Top